
How to Set Up NordVPN on a Router: Complete Guide in 2026
Reading time: 16 min
Last Updated: Jun 3, 2026

Setting up NordVPN on a router lets you encrypt all home devices connecting to the internet, including incompatible ones like your PS5 or smart TV. However, NordVPN’s router setup can be pretty technical, especially for beginners.
Unfortunately, only routers that support the OpenVPN protocol work with NordVPN. To further complicate things, every router has a unique interface that changes how you install the VPN. Plus, configuring a router wrong can make it useless.
I’ve put together a guide of NordVPN’s setup process on the most used routers so you don’t have to spend countless hours on YouTube tutorials or online guides. The first step is to get NordVPN from its website — you can try it risk-free with its 30-day refund policy.
Configure your router with NordVPN
Editor’s Note: We value our relationship with our readers, and we strive to earn your trust through transparency and integrity. We are in the same ownership group as some of the industry-leading products reviewed on this site: ExpressVPN, CyberGhost, Private Internet Access, and Intego. That said, our detailed reviews follow a strict methodology that examines all relevant performance factors to help you arrive at your own informed conclusion.
Quick Guide: How to Set Up NordVPN on Your Router
- Get NordVPN. Visit NordVPN’s official site, make a purchase, and download its app for your device.
- Configure your router. Open your router’s control panel and set up NordVPN manually. This can take up to 10 minutes.
- That’s it! Now you can protect all your devices with NordVPN connected to your home network.
Why Should I Use NordVPN on My Router?
Using NordVPN on your router extends protection and privacy across all devices connected to your network. The benefits include:
- Holistic security — you can secure all your devices by installing NordVPN on your router. It encrypts internet traffic, protecting against hackers and surveillance.
- No device limit — NordVPN on a router bypasses its device limitation. You can secure more devices than the usual 10-device cap allows.
- Uninterrupted streaming — it lets you access diverse content on platforms like Netflix without needing to set up the VPN individually on your devices.
- Secure smart devices — many smart devices lack built-in VPN support. With NordVPN on your router, these devices benefit from increased security.
- Reduced hassle — there’s less manual work once NordVPN is on your router. Every new device connecting to your network is automatically secured.
- Better gaming — by avoiding bandwidth throttling and bypassing regional restrictions, NordVPN on your router can ensure lag-free gameplay on unlimited devices.
Tutorial on Setting Up NordVPN on Various Routers
ASUS Routers
ASUS routers come equipped with an integrated OpenVPN client, which simplifies the NordVPN setup process across different models. To configure NordVPN on your ASUS router, follow these steps:
- Open ASUS control panel: Open your web browser and type the router’s IP address into the URL bar. Usually, it’s something like 192.168.1.1. Bookmark this page for future use.
- Log in: A page will open, prompting you to enter the username and password. You can find these credentials on the sticker pasted on your router.
- Add credentials: Click VPN under the Advanced Settings tab on the left pane > VPN Client > Add Profile.


- Enter credentials: In the Window that pops up, click on the OpenVPN tab and enter the following data:
- Description: Assign a name for your connection for easy identification.
- Username: Input your NordVPN username.
- Password: Type in your NordVPN password.
Keep this window open as you will continue to work on it. Open the NordVPN server utility page in a new tab and enable Auto-reconnection for uninterrupted VPN connectivity.


- Pick a server: Go to NordVPN’s server utility page > choose a server location > copy the server details.


- Download the config file: Click Show Available Protocols > Download OpenVPN configuration (TCP or UDP) > save it on your desktop. NordVPN only supports OpenVPN config.


- Upload the config file: Return to the ASUS control panel > click Choose file > locate the downloaded .ovpn file you saved, and click Upload. Click OK, and don’t tick the “import the CA” or “edit the .ovpn file manually” box.
- Click Activate: In the VPN Client window, activate the NordVPN profile. A blue tick will appear, indicating the connection status. If needed, you can deactivate the NordVPN connection in this window.


DD-WRT Routers
Setting up DD-WRT routers is more complex. Enter your router’s IP address on your browser, log in to access the Control Panel, and follow these steps:
- Set up DNS addresses: Go to Setup > Basic Setup > Network Address Server Settings (DHCP), and make the following changes:
- Static DNS 1: 103.86.96.100
- Static DNS 2: 103.86.99.100
- Static DNS 3: 0.0.0.0 (default)
- Use DNSMasq for DHCP: Checked
- Use DNSMasq for DNS: Checked
- DHCP-Authoritative: Checked
 section for setting up NordVPN on DD-WRT routers")
 section for setting up NordVPN on DD-WRT routers")
- Disable IPv6: From the main dashboard, go to Setup > IPv6 > Disable IPv6. Click Apply Settings and Save. This will ensure your IP address doesn’t leak.


- Tweak configuration settings: Go to the Sevices tab > VPN > and set the Start OpenVPN Client setting to Enable. Find the server hostname from the NordVPN server utility page mentioned earlier and put the other configuration settings as follows:
- Server IP/Name: Insert from NordVPN’s server utility page.
- Port: 1194 for UDP or 443 for the TCP protocol
- Tunnel Device: TUN
- Tunnel Protocol: UDP (or TCP)
- Encryption Cipher: AES-256-CBC
- Hash Algorithm: SHA-512
- User Pass Authentication: Enable
- Username, Password: Enter your NordVPN login credentials
- First Data Cipher: Not set
- Second Data Cipher: Not set
- Third Data Cipher: Not set
- Advanced options: Enabled (the below 3 options will appear)
- TLS Cipher: None
- LZO Compression: Disable
- NAT: Enable


- Run commands: In the Additional Config box, you need to execute the following commands. They ensure proper server authentication, optimize connection stability, and refine data transmission parameters:
- remote-cert-tls server
remote-random
nobindtun-mtu 1500
tun-mtu-extra 32
mssfix 1450
persist-key
persist-tun
ping-timer-rem
reneg-sec 0
#log /tmp/vpn.log
- remote-cert-tls server
- Copy NordVPN’s root configuration data: Download the config file from NordVPN’s server utility page. Open the .ovpn file through Notepad. Copy the text in the orange box below and paste it into the CA Cert box of the ASUS OpenVPN Client section.
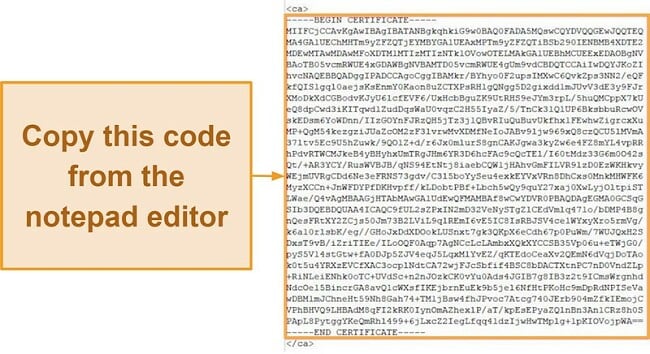
![Screenshot of certificate code on NordVPNs OpenVPN config file when opened through Notepad]()
- Tweak the config file: Copy the OpenVPN Static key in the config file and paste it under the section.


- Apply changes: Click Save and Apply Settings. Go to the administrative panel > Status > OpenVPN > State. Verify if it shows Client: Connected Success.


OpenWRT Routers
Getting NordVPN up and running on OpenWRT routers is more hands-on, but the flexibility and security payoff make it worthwhile. Before diving in, confirm your router runs on OpenWRT firmware and is equipped with the OpenVPN client. Once that’s squared away, follow these specific steps:
- Connect to OpenWRT Router: Connect a device to your OpenWRT router’s WiFi and enter 192.168.1.1 in the browser to access the command line. The default username is “root”. You’ll have to set a password after logging in.


- Install OpenVPN: Once logged in, you need to execute a series of commands to install OpenVPN. Copy-paste the below script into the SSH command line:
- opkg update
- opkg install openvpn-openssl
- opkg install ip-full
- Enable OpenVPN at Startup: Type the command below to ensure OpenVPN starts whenever your router does. This will start OpenVPN automatically.
- /etc/init.d/openvpn enable
- Download Configuration File: Download NordVPN’s server configuration file into the /etc/openvpn directory using the wget command. However, you’ll have to modify the code by inserting the server address after the “/servers/” string — example:
- wget -P /etc/openvpn https://downloads.nordcdn.com/configs/files/ovpn_udp/servers/uk2054.nordvpn.com.udp.ovpn


- wget -P /etc/openvpn https://downloads.nordcdn.com/configs/files/ovpn_udp/servers/uk2054.nordvpn.com.udp.ovpn
- Install Nano Text Editor: You can install Nano text editor with the following command:
- opkg install nano
- Modify Configuration File: Open the configuration file with nano by entering this command:
- nano /etc/openvpn/uk2054.nordvpn.com.udp.ovpn.
- Add “secret” phrase: Locate the auth-user-pass string, and add the word secret like “auth-user-pass secret.” Save these changes.


- Create Secret File: Use nano to create a new file named secret in /etc/openvpn. It should look something like: “nano /etc/openvpn/secret”. The Nano text editor will automatically open this file. Enter your NordVPN username and password in this file and save it.


- Change File Extension: Modify the extension of your configuration file from .ovpn to .conf. This will enable OpenVPN to locate it quickly. You can also use the mv command below:
- mv /etc/openvpn/uk2054.nordvpn.com.udp.ovpn
/etc/openvpn/uk2054.nordvpn.com.udp.conf
- mv /etc/openvpn/uk2054.nordvpn.com.udp.ovpn
- Specify Configuration File: Using UCI commands, specify the modified configuration file in /etc/config/openvpn as follows:
- uci set openvpn.nordvpn=openvpn
uci set openvpn.nordvpn.enabled=’1′
uci set openvpn.nordvpn.config=’/etc/openvpn/us6778.nordvpn.com.udp.ovpn’
uci commit openvpn
- uci set openvpn.nordvpn=openvpn
- Include server details: Add the NordVPN server details to the /etc/config/openvpn directory file so it looks like this:
- config openvpn ‘nordvpn’
option enabled ‘1’
option config ‘/etc/openvpn/us6778.nordvpn.com.udp.ovpn’
- config openvpn ‘nordvpn’
- Configure Network Interface: Define and configure a new network interface in /etc/config/network by copy-pasting the following:
-
-
- uci set network.nordvpntun=interface
uci set network.nordvpntun.proto=’none’
uci set network.nordvpntun.ifname=’tun0′
uci commit network
- uci set network.nordvpntun=interface
-
Add the following strings to the /etc/config/network file:
-
-
- config interface ‘nordvpntun’
option proto ‘none’
option ifname ‘tun0’
- config interface ‘nordvpntun’
-
-
- Create Firewall Zone: Establish a firewall zone to forward LAN traffic to the VPN. Type this command: lan
- Set NordVPN DNS Servers: Alter your router’s settings to use NordVPN DNS servers by inputting these series of UCI commands:
- uci set network.wan.peerdns=’0′
uci del network.wan.dns
uci add_list network.wan.dns=’103.86.96.100′
uci add_list network.wan.dns=’103.86.99.100′
uci commit
- uci set network.wan.peerdns=’0′
- Tweak the WAN section: Add and save the following strings to the /etc/config/network file’s WAN section:
- config interface ‘wan’
<...>
option peerdns ‘0’
list dns ‘103.86.96.100’
list dns ‘103.86.99.100’
- config interface ‘wan’
- Verify Setup: Once everything is in place, head to the NordVPN homepage to check your protection status. If it displays “Protected,” you’ve successfully set up NordVPN on your OpenWRT router.
TP-Link Routers
Setting up NordVPN on a TP-Link router is relatively easy. Follow these steps:
- Access Router Control Panel: Initiate by navigating to your router’s control panel through a web browser. You can access it by typing 192.168.0.1 or 192.168.1.1 in the address bar.
- Navigate to VPN Client: Go to the Control Panel > Advanced tab and locate and select VPN Client from the side menu to enable the VPN client option.


- Create New Connection: Go to the Server list section and select Add. This will prompt you to input the following details regarding your NordVPN connection:
- Description: Assign any name to your connection for easy identification.
- VPN Type: Choose OpenVPN.
- Username & Password: Input your NordVPN credentials — you can find this on your NordVPN account dashboard.
- Upload Configuration Files: Visit NordVPN’s server utility page to select a preferred server. Click on Show Available Protocols and download the OpenVPN configuration file. Return to your router’s control panel, choose Browse in the Add Profile window, and upload the downloaded files.


- Enable NordVPN Connection: Activate the newly established NordVPN connection in the ‘Server list.’
- Select Devices: In the Device List section, pick the devices you want to secure with NordVPN. Check the box for each device. You can also set up NordVPN on compatible smart TVs.


- Save Changes: Confirm and save the changes by clicking ‘OK.’
Tomato Routers
If your router uses Tomato firmware, follow these steps to set up NordVPN:
- Access Tomato Control Panel: Open a web browser and enter your router’s IP address, usually 192.168.1.1, to access the Tomato control panel. Log in using your router’s credentials.
- Navigate to VPN Tunneling: Find and click on the VPN Tunneling option in the menu, and then select OpenVPN client.
- Add a New Client: Click the ‘Add’ button to create a new OpenVPN client configuration. This opens up the settings for the new VPN connection.
- Input Basic Settings: Configure the basic settings as follows
- Start with WAN: Check the box to enable the VPN to start with your WAN.
- Interface Type: Set to TUN.
- Protocol: Select UDP (recommended) or TCP based on your preference.
- Server Address/Port: Obtain the server address from the NordVPN server utility page and input it along with the port number, typically 1194.


- Configure Advanced Settings: Scroll down to the advanced settings and make these adjustments:
- Poll Interval: 0
- Redirect Internet traffic: Checked
- Accept DNS configuration: Strict
- Encryption Cipher: AES-256-CBC
- Compression: Disabled
- TLS Renegotiation Time: -1
- Connection Retry: -1
- Input NordVPN Credentials: Scroll further down to locate the Authentication section. Input your NordVPN username and password in the appropriate fields.
- Configure Custom Configuration: In the ‘Custom Configuration’ field, input the following lines:
- remote-cert-tls server
Remote-random
Nobind
tun-mtu 1500
tun-mtu-extra 32
mssfix 1450
Persist-key
Persist-tun
reneg-sec 0
auth sha512
#log /tmp/vpn.log
#auth-user-pass /tmp/password.txt (delete the # if the router doesn’t have credential fields)


- remote-cert-tls server
- Upload .ovpn File: Visit NordVPN’s server page and download the OpenVPN configuration file (.ovpn) for your selected server. Return to the Tomato control panel, find the Keys tab, and open the downloaded .ovpn file with Notepad. Copy and paste the content into the respective fields:
- Static Key: Find text from the to-block
- Certificate Authority: Find text from the to-block


- Configure the router to use NordVPN’s DNS servers: Go to Basic > Network, and make the following changes under the WAN section.


- Save and Start the VPN: Scroll to the bottom of the page and click Save. After saving the settings, click Start to initiate the NordVPN connection.
- Verify Connection Status: Check the Status section at the top of the page. If the setup is successful, it will display Connected.
What to Do if You Can’t Set Up NordVPN on a Router
A common culprit in not being able to set up NordVPN on a router is your router’s incompatibility. Make sure you’re using a router with an updated firmware. If that’s not the issue, here are a few troubleshooting tips:
Check if your router is working
First and foremost, check the status of your router. Inspect all the connecting cables and power supply, and monitor the indicator lights on the router. A non-functional or poorly connected router will prevent NordVPN from working. Addressing any physical connectivity issues is a critical first step in troubleshooting.
Update firmware
Outdated firmware leads to incompatibility with NordVPN. Regularly check the manufacturer’s website or access the router’s control panel for available firmware updates. Installing the most recent firmware resolves potential compatibility issues and minimizes the risks of potential DNS leaks when using NordVPN on your router.
Check for Double Coverage
Double coverage occurs when you’re using multiple VPNs simultaneously, which leads to conflicts. Each VPN service has its configuration settings and protocols. When 2 VPNs are active at once, their configurations often conflict. This leads to connectivity issues, drops in connection, server load, and authentication failures.
Review configuration settings
Beginner users make mistakes in configuring the router correctly. Re-examine the setup steps and ensure all the details are entered correctly, especially server addresses and login credentials. Even a small typo can cause a headache. Double-check these credentials against those provided in this guide to rule out discrepancies.
Try a different VPN server
Server-specific issues such as overloading or temporary downtimes can affect connectivity. Your chosen server may be experiencing high traffic, undergoing maintenance, or facing temporary technical issues. If you encounter persistent connection problems, try a different server address from the NordVPN server utility page.
Reset the router to factory settings
Performing a factory reset erases all customized settings, returning the router to its original state and erasing all network names, passwords, and security settings. This can resolve issues of incorrect configurations or conflicting settings by eliminating any setup errors or misconfigurations. However, you should only do this as a last resort.
FAQs on Setting Up NordVPN on Routers
Is it safe to connect NordVPN on my router?
Yes, it’s safe, and NordVPN is a reputable service. While it’s a bit more complex than simply opening an app and hitting the connect button, refer to my quick guide on setting up NordVPN on your router. Unfortunately, it’s not a one-size-fits-all approach as routers have different firmware, so setting up NordVPN varies.
Which routers are compatible with NordVPN?
NordVPN is compatible with all the popular routers like ASUS, DD-WRT, TP-Link, and more. Your router should support the OpenVPN client to work with NordVPN. Here’s a summarized chart if you decide to purchase a router with NordVPN.
| Compatible | ASUS, ASUS Merlin, DD-WRT, GI.iNET, Mikrotik, NetDUMA, OPNsense, OpenWRT, Padavan, Sabai, Tomato, pfSense, DrayTek, EdgeRouter, TP-Link, Privacy Hero, Roqos |
| Incompatible | Arris, Belkin, Cisco, D-Link, Huawei, Netgear, TRENDnet, Tenda, TotoLink, Ubee, Orbi, Spectrum, Xfinity, Eero, Verizon, Starlink, AT&T, Linksys (except WRT32X, WRT32XB AC3200), and Nighthawk (unless the router is using DumaOS) |
Are there any routers with in-built NordVPN?
Yes, flash routers have NordVPN pre-configured, but they are expensive. These include Roqos Core, NordLynx WiFi6, and ASUS ROG AXE16000. I suggest configuring it yourself through these tutorial guides for various routers. Though it may look a bit complicated, it’s actually pretty straightforward if you follow the step-by-step tutorial I’ve detailed for each router.
Is a VPN router the same as a regular one?
A VPN router has a VPN pre-configured, whereas a regular one doesn’t. This saves you the hassle of manually setting it up. When DIY’ing, ensure that you don’t make these mistakes when configuring the router — it’ll save you a lot of unnecessary headaches.
What do I need to set up NordVPN on my router?
First, you’ll need a NordVPN offer. NordVPN is one of the top-rated VPNs that provide excellent security and privacy. Next, make sure you have the following:
- A compatible router — ensure your router supports the OpenVPN protocol, as NordVPN is only configurable on such devices. Check the list of supported routers beforehand.
- A wired connection — an Ethernet cable is required to connect your router to your computer during the setup.
- A computer — you need a compatible device to access and adjust your router’s settings.
- Your router’s IP address — knowing this address is essential to access the settings. It’s usually located in the router’s manual or through your ISP.
- Server and protocol configuration files — these are needed for creating a connection and are available on NordVPN’s server utility page.
Can I set up a free VPN on my router?
Yes, but I don’t recommend it. Most free VPNs can’t protect you adequately or have DNS leaks. Instead, you can use a trustworthy option like NordVPN for free for 30 days with its money-back guarantee.
While there are a few safe-to-use free VPNs, they have limitations like data caps, bandwidth restrictions, and overcrowded servers. Apart from these, most free VPNs I tested had shady privacy policies, and some even infected my devices — I advise you to steer clear of them.
Use NordVPN on Your Router Today!
Setting up NordVPN on your router can protect all your home devices, even those that don’t natively support the VPN, like game consoles and some smart TVs. The only catch is you have to configure your router, which is a bit complicated manually, but it sounds more intimidating than it is.
After configuring NordVPN on my home router and for some of my friends, I can assure you it’s not that difficult. Just make sure your router supports OpenVPN. Follow the step-by-step tutorials without rush, and remember that each router’s configuration process differs.
Other Top VPNs for Routers
Editor’s Note: We value our relationship with our readers, and we strive to earn your trust through transparency and integrity. We are in the same ownership group as some of the industry-leading products reviewed on this site: ExpressVPN, CyberGhost, Private Internet Access, and Intego. That said, our detailed reviews follow a strict methodology that examines all relevant performance factors to help you arrive at your own informed conclusion.


Leave a Comment
Cancel