
Carbonite Download for Free - 2024 Latest Version
| 6.4.1 | |
| Windows | |
| Free Trial | |
| Carbonite | |
| 2,168,299 | |
| Cloud Storage Platform |

Don’t leave the security of your data to chance. Carbonite doesn’t just archive your files, which requires manual uploading for each file. It also creates a complete backup, which is stored on a cloud-based server to ensure it never gets lost.
The lightweight software works whenever your computer is on, continuously updating your backup files. This way, you don’t have to worry about re-uploading something or only having a backup of an outdated file.
The tool is not only easy to use, but it encrypts your files to protect them from hackers or unauthorized people viewing them.
Follow the instructions below, and I’ll show you how to download Carbonite for free.
How to Download Carbonite on PC for Free
- Go directly to the official Carbonite free trial page.
- Sign up for a 15-day free trial by entering your email, password, and country of residence, and then press the Submit button. The setup file will automatically download to your computer.
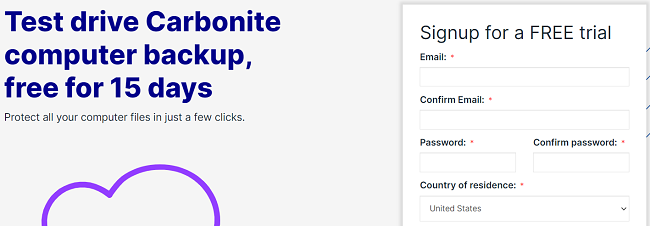
![Carbonite Create Free Trial]() When the file download is complete, open it, and the setup wizard will begin.
When the file download is complete, open it, and the setup wizard will begin. - Read the Carbonite General Terms of Service and press the “I Agree” button.
- Carbonite will install on your computer.
Carbonite Overview
Backing up your computer files and folders with Carbonite is an easy way to ensure you never lose any important data. The first time you use Carbonite, it will scan your computer and create the initial backup. You can browse through the list of data that it backs up, and if you see anything is missing, you can manually add them to the backup. Once it’s in the system, Carbonite will continue to back up any updates or changes to the file.
There are several different Carbonite subscription options, although they each have unlimited data transfer. The plans differ with the availability of advanced features, like automatic video backup, external hard drive backup, and courier delivery of recovered files.
Carbonite Features
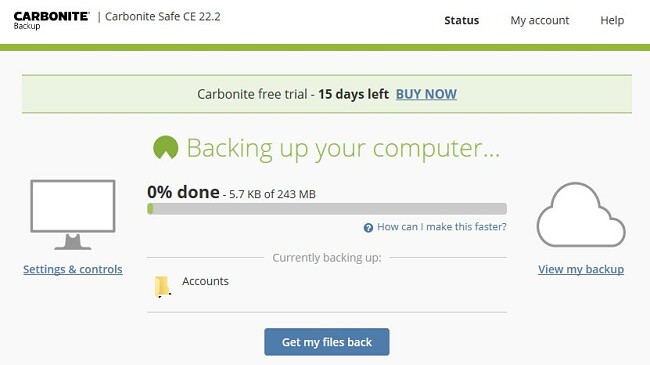
Carbonite is a very easy program to use. The desktop client shows you a status report, which includes the total size of your backup, and lets you know if any backups are in progress. You can open your account setting, view the files, and restore files through the client as well.
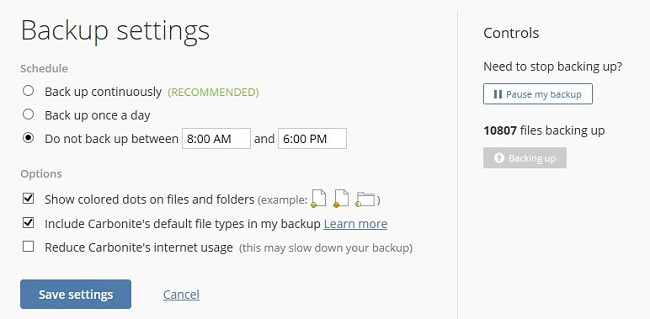
Customize Your Backup
The default setting is that Carbonite continuously runs in the background to prevent any data loss. However, you can turn off this feature and create a backup schedule so that it scans and updates files at a specific time or day of the week.
The automatic cloud backup works with:
- Pictures
- Document
- System Setting
- Music
- Videos
You can adjust the Carbonite settings to ignore specific files, file formats, and folders. Files that are waiting to be uploaded to the cloud will have an orange dot, the dot changes to green when the upload is complete. A folder with a dot that is only partially colored means that some files in the folder are not being uploaded.
Version History
When a file is updated, Carbonite will replace the old file with the new one. It will also save up to 12 previous versions of each file. This allows you to go back and track changes or restore an earlier version of the file.
When you delete a file from your computer, the backup file will remain on the cloud. The file will be flagged so you know that the original file has been deleted. I found this helpful for cases where the file was deleted by accident. In that case, you can simply restore the backup file.
Restoring Your Data
Carbonite has two options for restoring data from the cloud server:
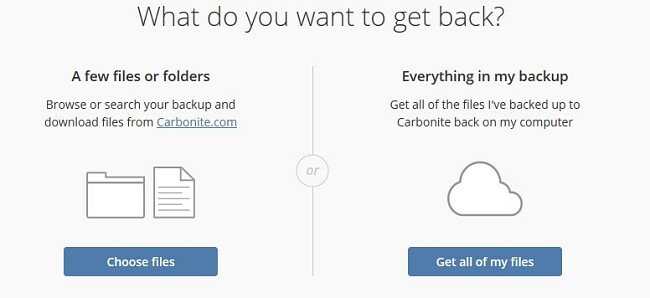
- All files: If your computer crashed or you got a new computer, you can opt to restore the files through the desktop client. In the case where you’re using the original computer, Carbonite can restore the files in their original folders. Otherwise, you can add all the files to a new folder.
- Choose specific files: Use the web dashboard or the Carbonite backup drive to select specific files to move from the cloud back to your computer. This option limits transfers to 5,000 files or 10GB at a time.
Upload Speed
Carbonite may not be the swiftest backup solution out there, but its speed shouldn’t pose a significant concern. Its continuous background operation employs optimized resource usage to maintain your computer’s performance while ensuring effective functionality. Data encryption is another factor that slows down the transfer, and I’m more than happy to trade off speed for security, especially when it’s not a performance issue.
Secure Your Data
Carbonite has several security measures in place to protect your data.
SSL/TLS: While the data is being transferred from your computer to the cloud, TLS encryption secures the files. This prevents hackers and Man in the Middle attacks.
128-bit encryption: The cloud servers are secured with 128-bit encryption. If you upgrade to a business account, the encryption level improves to AES 256-bit.
Zero-Knowledge Encryption: During the installation, Carbonite gives you the option of managing the encryption key. This is an added level of security, as it means that no one at Carbonite can access your files.
Two Factor Authorization: You can enable two-factor authorization so that you can’t just access the account with a password. You’ll also need a code that is sent to your email or via SMS.
How to Uninstall Carbonite from your PC
If the Carbonite desktop client is not the right backup platform for your needs, you can uninstall it in a few simple steps.
- Type Add or Remove Programs in the Windows search bar and press the Enter key.
- Locate Carbonite in the list of installed programs and press the Uninstall button.
![Uninstall Carbonite]()
- Confirm that you want to delete the software, and Windows will safely remove the program from your computer.
It’s important to note that uninstalling the desktop client will not delete your backup files from the cloud unless you cancel your account. You will still be able to access them through the web interface or by installing Carbonite on another computer.
Free Carbonite Alternatives
- Acronis: Back up your file and prevent malware with one easy-to-use platform. Acronis allows you to clone your disk, back all your data to a cloud or a local disk, and save previous file versions, so you’ll never lose your work. The anti-malware feature works 24/7 to keep your device protected from threats. Get a 30-day free trial and try the advanced features for yourself.
- Dropbox: Unlike Carbonite, which continuously backs up your computer, you have to add files to your Dropbox cloud. It then syncs across all devices and platforms, so you can access your files from anywhere.
FAQ
Is Carbonite free?
Is Carbonite secure?
Can Carbonite restore specific files or just the entire database?