How to Cancel Adobe Premiere Pro & Get a Full Refund
Reading time: 14 min
First published: Mar 22, 2022
Updated 3 times since publishing

I was pleased to see that Adobe Premiere Pro stood behind its 14-day money-back guarantee and quickly gave me a complete refund when I canceled my annual subscription plan, even though I started with a 7-day free trial.
When it comes to video editing, Adobe Premiere Pro is one of the best programs available. It has unlimited tracks and plenty of tools and features that work with anything from short clips for social media to full-length films.
However, it isn’t necessarily for everyone, and therefore, I had to be certain that the 14-day money-back guarantee worked as advertised. I created an account and purchased an annual subscription intending to cancel the account within 14 days.
If you decide to cancel your account and get a refund, but you’re still looking for an advanced video editing tool, you should try CyberLink PowerDirector. It has a multi-track editing board that is compatible with all types of media formats to produce the perfect video. PowerDirector is less expensive than Adobe Premiere Pro and comes with a 30-day money-back guarantee.
Before I review PowerDirector and other alternatives, I’ll walk you through canceling your Premiere Pro account and getting a full refund. The process is simple, follow these simple steps, and you’ll have your refund within 5 business days.
Try Cyberlink PowerDirector Risk Free for 30 Days!
Quick Guide: How to Cancel Adobe Premiere Pro and Get a Full Refund
- Log in: Open the Adobe.com website and sign in to your account.
- Cancel Subscription: Go to your account settings section, and cancel your subscription.
- Get a Refund: After canceling your account, a refund will automatically be issued within 5 business days.
Step-By-Step: How to Cancel Adobe Premiere Pro
Premiere Pro has a 14 money-back guarantee. This means that if you aren’t sure if it’s the right video editing software for you, you can create an account and test it with no risk. If it doesn’t meet your expectations, you can just cancel the account within 14 days, and a refund will automatically be sent to your credit card. Just follow these simple steps, and you won’t have to speak with a sales representative, customer support, or a retention agent.
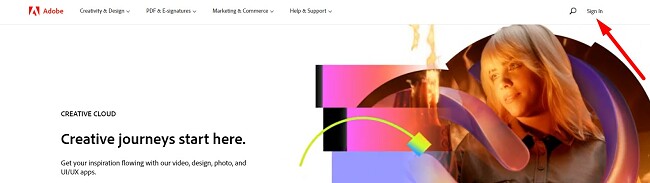
- Log In to the Adobe Website: The only way to cancel your Premiere Pro account is to visit the official Adobe Website and sign in to your account. This can not be done through the Creative Cloud or Premiere Pro applications.
![]()
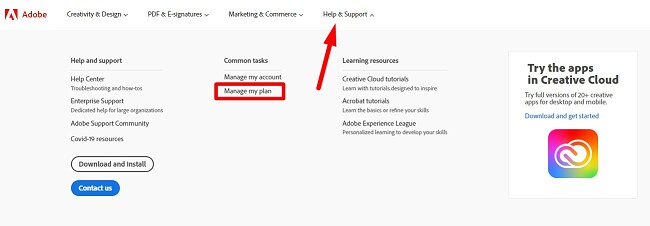
- Help & Support: On the menu bar, click on the Help & Support link to open the dropdown menu. One of the options in the menu is Manage Plans. Click on it to open your subscription page.
![]()
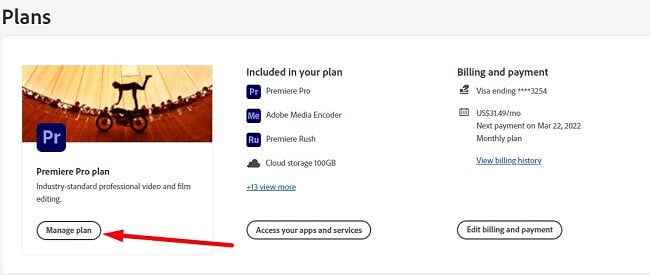
- Manage Plans: You’ll see a box for your Premiere Pro subscription. Click on the Manage Plan button located at the bottom of the box.
![]()
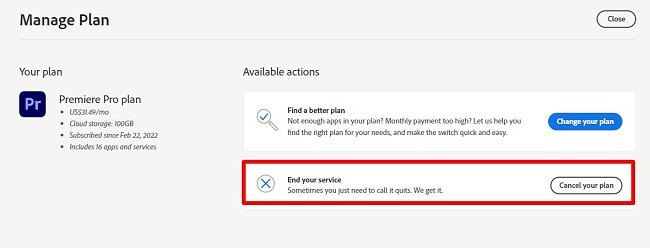
- Available Options: Premiere Pro gives you several choices. Click on the Cancel Your Plan button.
![]()
- Leave Feedback: You must give at least one reason for canceling your account. Your reason for canceling won’t affect your refund.
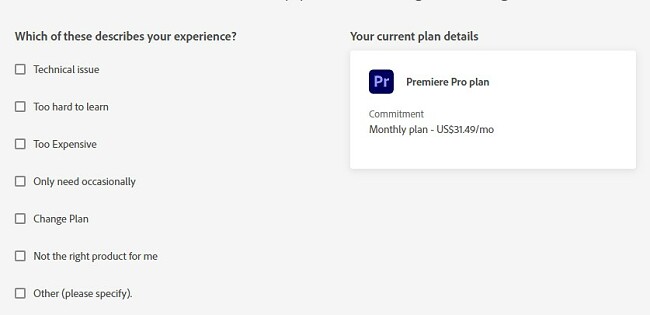
![]()
- Confirm: Be aware that once you cancel the account, your cloud storage will be reduced from 100GB to 2GB, and you will instantly lose access to your Premiere Pro account.
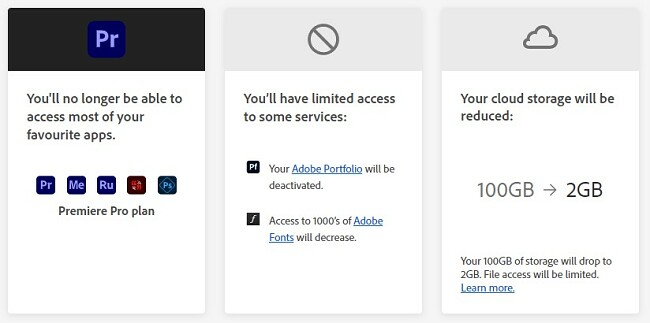
![]()
- Last Chance Offer: Adobe will make several offers to entice you to continue your account. If you aren’t interested in the offers, press the No Thanks button.

![]()
- Review: You will be presented with a review of cancellation terms. If you’re canceling the account within 14 days, you’ll see confirmation of your refund. Press the Confirm button to cancel your account officially.
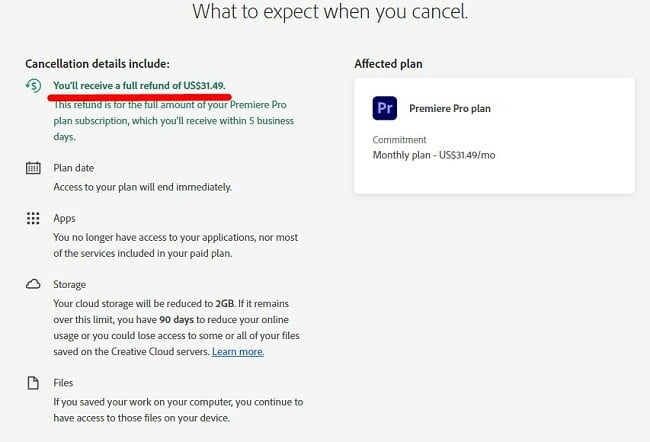
![]()
Best Alternatives to Adobe Premiere Pro (Tested in 2026)
1. Cyberlink PowerDirector: Comprehensive Toolset for Editing 2D, 3D, HD, and 360-Degree Videos

- Customizable workstation with multiple options of editing style
- Chorma-Key (green screen) gives you flexibility when recording videos
- Sky replacement and AI Motion tracking tools
- Large selection of transitions and special effects
- Publish directly to social media and video platforms
- 30-day money-back guarantee
When it comes to video editing software, few programs can match up with the CyberLink PowerDirector. While it has professional-grade tools, it’s easy enough for anyone to use. It comes packed with features that can take a simple video clip and transform it into a polished video that can be used for everything from social media posts and slideshows for family events to full feature films.
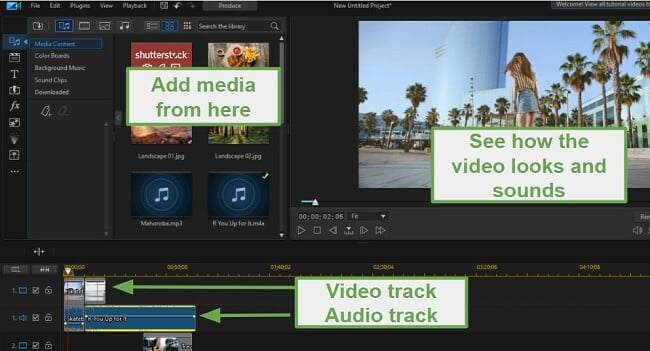
The PowerDirector workstation has a clean interface that is divided into three main sections.
- Media: On the top left side is where you can add all the various media elements (video, audio, images, and effects) that you might want to insert into your video.
- Preview Window: You can view your work and see how it transforms from the editing timeline to how it will look once it’s published.
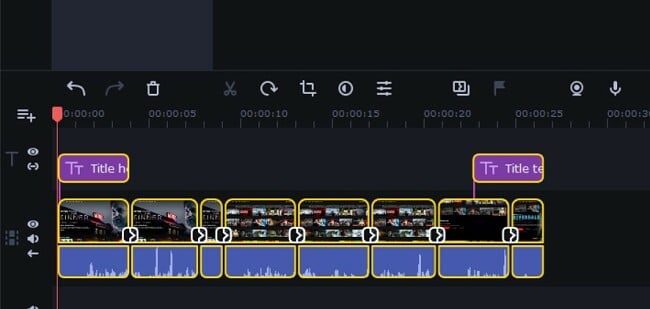
- Tracks: The multi-track editing board is where you can import all your media, transitions, effects, images, text, and audio files that make up the video. The editing tools are just above the timeline and you can splice, cut, merge, speed up, slow down, and control your video playback.
PowerDirector gives aspiring film directors access to all the features needed to produce beautiful videos:
- Picture in Picture Editing: One of the newest features in PowerDirector, Picture in Picture, transforms the video clips into a collage style grid, and you can edit each section separately.
- Green Screen Editing: You can add anything to your background when using the Chroma Key function. You don’t have to record in front of a green screen, as any solid color will do; just make sure to adjust the settings to work with your background.
- Customize your workstation: The default workstation has all the commonly used tools and displays the work in the popular timeline style. However, you can change the interface to a storyboard mode, slideshow, creator, or auto-mode that will adjust based on your project. You can also choose which tools should be added to the main toolbar to work more efficiently.
- 360-degree and VR editing modes: In addition to 2D and 3D videos, PowerDirector gives you the tools needed for 260-degree videos that are compatible with most VR devices.
- Royalty free stock videos and sound effects: Sometimes, you need a video clip to ease the transition between two clips, or sound effects that will help set the tone. Go through the PowerDirector media library and find the items you need for free.
- Learning center: An active community of video producers are happy to give tips, tricks, and examples of their work. You can also find hundreds of video tutorials and learn to master all the tools and features.
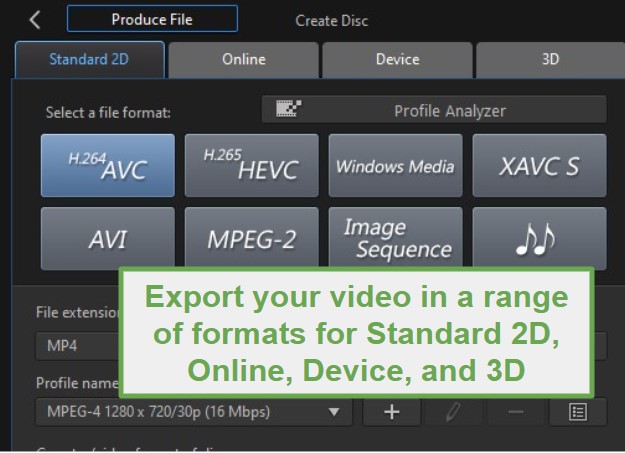
When your project is complete, you can produce the video in various formats. If you’re planning on directly publishing the video online, PowerDirector can upload it to Facebook, Vimeo, DailyMotion, and Nico Nico Douga.
Cyberlink PowerDirector has a proven 30-day money back guarantee that gives you plenty of time to evaluate the software and ensure it has the tools that you need for your next video production project.
2. Movavi Video Editor Plus: Cloud-based Video Editor Uses AI to Improve Video Quality

- Multi track editing board works with audio, video, text, and effects
- Large selection of stickers and transitions
- View edits in preview mode
- Record audio and video from your computer and upload them directly to your media library
- Publish your videos in a wide range of formats
- Try it free for 7 days
Movavi has revolutionized the video editing industry with easy to use yet powerful video editing tools. Video Editor Plus gives you the ability to create, edit, and produce quality videos of all lengths. Even if you’ve never edited a video file before, you should be able to effectively use all the tools within a short time.
The Video Editor Plus interface has an intuitive layout, with all the key tools placed right next to your editing board, so you don’t have to search through endless menu options or visit multiple tabs to find the tools you need.
Once you open your project, you can upload all the different media elements that you want to include to your workstation. The multi-track timeline has drag and drop capabilities, so you can easily move items from your media library to exactly where you want them on the timeline. Video Editor Plus gives you the tools needed to manipulate the timing of the video clips. You can also splice, merge, crop, and rotate each clip.
Video Editor Plus also supports Chroma Key, or green screen, so you can seamlessly add any background to your video.
I was impressed with the AI features that are designed to improve the video quality. The software includes a tool that can detect shaky video, understand the direction of the shaking and stabilize it, which improves the overall video quality and accuracy. Another AI tool will remove unwanted background sounds, sync the audio and video clips, and adjust the colors if necessary.
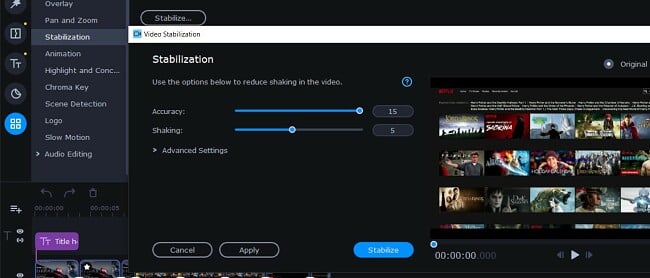
Use sliders to remove the shaky video
There are plenty of free filters, stickers, and text overlays that you can add to your video to make it stand out. If you don’t see what you want, Video Editor Plus has an effects store where you can purchase thematic extras that can be seamlessly added to your video.
Once the project is complete, you can decide the quality and format you want to publish your video. You can export the video in the following formats, MP4, AVI, MOV, SWF, GIF, MKV, and more. The videos can be played on Android, iOS devices, SmartTV, game consoles, or uploaded directly to YouTube, Vimeo, and Google Drive.
Movavi Video Editor Plus lets all new users try the software completely free for 7 days, without having to use your credit card.
3. Avid Media Composer: Easily Combine Multiple Video, Audio, and Text Editing Tracks

- Complete control of color and tone
- Up to 99 video and audio tracks per project
- Export videos directly to the web
- Works with raw video files
- Compatible with Avid plugins
- 30-day money back guarantee
Avid Media Composer is a professional-level video editor that is popular among everyone, from Hollywood movie editors to novices creating short video clips for fun.
While it’s not the easiest software to use, Avid provides guided tutorials to help new users acclimate themselves to the different editing tools and features, to help speed up the learning process.
Avid Media Composer has several keyboard shortcuts that will help you quickly view clips, mark IN and OUT and move a video clip to your media bin.
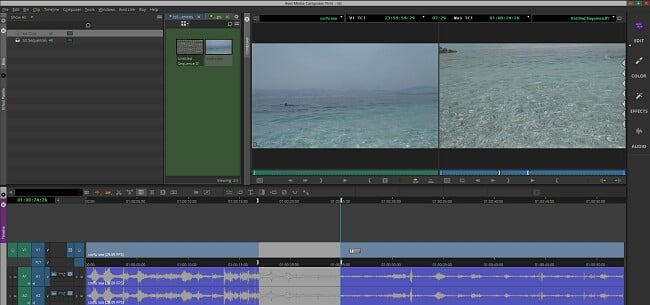
Before you can add a video clip or media element to your timeline, the properties window will open. You can upload raw video file to your media library bin and then add it to the editing track. Choose the project’s video resolution and frame rate, and Avid Media Composer will adjust the clip settings for optimal performance.
Avid Media First comes with editing tools that are typically reserved for Pro or Premium packages. You can adjust the colors and tones of the video with a full selection of color correction tools with scopes, predefined effects, hue offsets, and luma range.
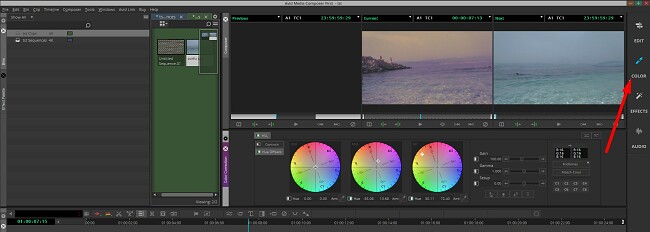
In Avid Media Composer, you’ll find a range of tools to address shaky videos, or alternatively, to add a deliberate shaky effect if it complements your video’s style. This powerful software allows you to manipulate video clips by adjusting their speed, slowing them down, or even playing them in reverse. Additionally, you can easily trim or crop your videos and enhance them with text overlays, choosing from a variety of fonts, styles, and colors to suit your preferences.
One of the nice things about the software is that it is compatible with add-ons and plugins that can add features that you don’t get with the base application. There is Avid Marketplace where you can download the plugins, that can give you access to different editing tools, more title sequence options, unique transitions, and much more.
If you want to experience the full power of Avid Media Composer, you can download a free 30-day trial and see if it has all the tools you need.
Adobe Premiere Pro Money-Back Guarantee Policy
The Adobe Premiere Pro money-back policy is very straightforward. You have 14 days to evaluate the software, and if you’re not satisfied for any reason, you can cancel the account and get a full refund. It will take up to five business days for the refund to be processed, and it will be refunded back to the same credit card used to purchase the subscription.
If you wait until after 14 days to cancel your account, your refund will depend on the subscription package you purchased:
- Monthly subscription: There is no refund after 14 days. You can cancel your subscription, and you will be able to access your account until the end of the current billing cycle.
- Annual subscription with monthly payments: You have the option to cancel your account at any time, but if it’s after 14 days of starting your subscription, you will need to pay a cancelation fee. The fee is 50% of the remaining balance on your account. The remaining 50% will be refunded.
- Prepaid annual subscription: There is no refund for cancelations done after 14 days. If you cancel your subscription, you will continue to have access to your Premiere Pro account until the current billing cycle ends.
It is important to remember that the 14-day money-back guarantee is based on the time you bought the subscription and not necessarily the date. What this means is that if you finalized the payment for your subscription at 9:00 in the morning on the 1st of the month, you don’t have the entire day of the 14th to cancel. If you wait until 9:30, the refund will not be automatically processed. If this happens to you, I recommend talking with the customer support team and explaining the situation.
FAQ
How do I cancel and get my money back from Adobe Premiere Pro?
Can I cancel Adobe Photoshop at any time?
How long does Adobe Premiere Pro take to issue a refund?
The Bottom Line
Premiere Pro is my preferred choice due to its comprehensive set of editing features and seamless integration with other Adobe products. Nonetheless, if you find that you do not require the additional features it offers or prefer a more budget-friendly alternative, rest assured that you can cancel your subscription and obtain a full refund within 14 days of purchase. The cancellation process is straightforward and hassle-free, eliminating the need to engage with a customer support representative.
After canceling your account, you can pick a different quality video editing program that has the tools and subscription options for your budget. My top Premiere Pro alternative is Cyberlink PowerDirector, which has multi-track editing, creative transitions, multiple titles options, and much more. It’s an easy program to learn. If you’re not sure if it’s the right option for you, try it out risk-free, with it’s generous 30-day money-back guarantee.


Leave a Comment
Cancel