
Luminar AI Download for Free - 2024 Latest Version
| 1.4.1 | |
| Windows, Mac | |
| Free Trial | |
| Skylum | |
| 2,535,375 | |
| Video Editor |

Luminar AI for Windows is a powerful photo editing software created by Skylum, that makes it easy to adjust your photos so they look just the way you want them. It’s an easy program to learn, with an intuitive workspace, a good selection of AI-based templates, and professional tools. The tools are designed to remove blemishes, unwanted background images, adjust the colors, and much more quickly and without any technical knowledge.
Luminar claims to be the first photo editor to use Artificial Intelligence, and while I don’t know if this is true, I do know that it is the best one I’ve ever used. There are different categories of tools, just click on the ones you want to use, adjust the sliders, and watch as the program instantly applies the edits to your images.
Luminar AI offers you a 30-day money-back guarantee to test all the advanced features and see if it’s the right tool for you. Follow the steps below, and I’ll show you how to download and install Luminar AI on your PC risk-free.
Try Luminar AI Risk-Free for 30 Days!
How to Download and Install Luminar AI for Free on Your PC
- Click here to go directly to the official Luminar AI download page.
- Press the View Plans button.
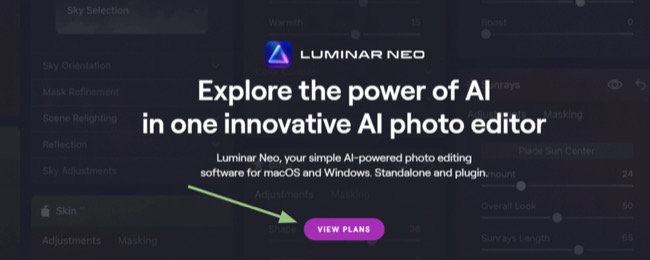
![Luminar view plans screenshot]()
- Choose your preferred plan. Each plan comes with a 30-day money-back guarantee, so you can cancel your subscription and receive a full refund.

![Luminar pricing plans screenshot]()
- Enter your credit card information and press Pay.
- Press the Download button and the latest version of Luminar will download to your PC.
- Open the file when the download is complete to run the installation wizard.
- Accept the Licensing Agreement.
- Click the Install button, and the Luminar software will install on your computer.
- When the installation is complete, press the Launch button to begin using Luminar AI.
Luminar AI Overview
With Luminar AI, you don’t have to be a graphic designer or professional photographer to produce beautiful pictures. It has the necessary tools to change body features, remove strangers or unwanted objects from images, add augmented objects, and so much more. However, what sets it apart from other photo editing software is its reliance on AI to get the job done quickly.
By automatically correcting and editing the common errors and issues, Luminar AI can save you a lot of time. Then, you can have fun playing with the other features and tools to enhance your picture.
Additionally, its rapid processing time accelerates post-production, enabling you to easily share your images on your social media platform, incorporate them into your portfolio, or have them printed and displayed.
Luminar AI Features
I like Luminar AI because after it completes the minor corrections, it has a host of features that I use to adjust my pictures. I’m not just talking about the basics like cropping, rotating, and repositioning but rather edits that would take to learn with other digital editing software. With Luminar AI, it’s as easy as clicking on an area you want to fix or adjusting a slider until you get the results you want.
There are four categories of tools in Luminar:
- Essentials: These are the basic editing tools, such as erasing, changing the lighting, black & white, reducing noise, and adding structure. They can be used on most pictures and execute core adjustments.
- Creative: This is where you can add different filters and moods to enhance your pictures. The options include adding sun rays, dramatic lighting, glow, atmospheric conditions, sky, and more.
- Portrait: The portrait tools are used on people in the pictures and can change their face, skin tone, body shape, and blur the background to enhance focus on the primary object in the picture using Bokeh.
- Professional: Get precision controls that will be appreciated by professional photographers and graphic designers. These tools are used to control color and tone.
Getting Started with Luminar AI
The first time I opened Luminar, there was a quick tutorial that showed all the different tools and editing options. It comes with five images to work on, and I found the guide to be very helpful.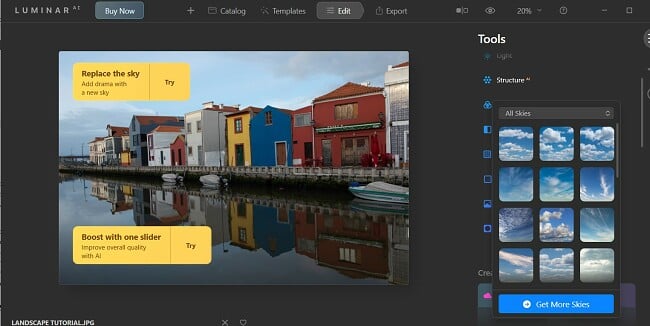
After I finished playing around with the simple images, I tried uploading my own pictures. Surprisingly, this took me some time to figure out. It took me a few minutes of clicking around until I found a + icon on the menu bar. I’m not a fan of the gray on black color scheme since it made it harder than it should have been to find. Once I clicked that, I had the option to upload images or folders.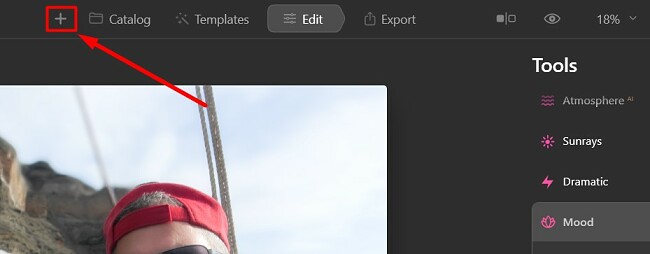
Once your files are uploaded, you can click on the Catalog tab, located next to the + button, and organize them into albums.
Good Selection of AI Templates
Most of the AI editing is processed through the collection of templates. Luminar has a good selection of free options, and even more are available in the Marketplace that you can purchase.
The idea behind Templates-based editing is to streamline the editing process in an enjoyable manner. The templates were designed to use AI to understand the strengths and weaknesses of every image. Then, it automatically fixes common problems and adds enhancements based on the template style you chose to help inspire new ideas.
Here’s a panoramic picture I took of a sunset over the sea. Unfortunately, the colors were all washed out.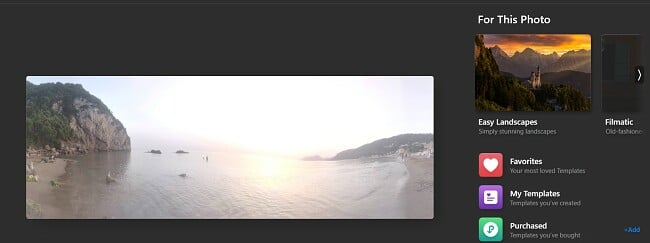
I uploaded the picture to Luminar and used a scenic sunset template, and while the changes are subtle, it brings out the color that made it such a spectacular sunset.
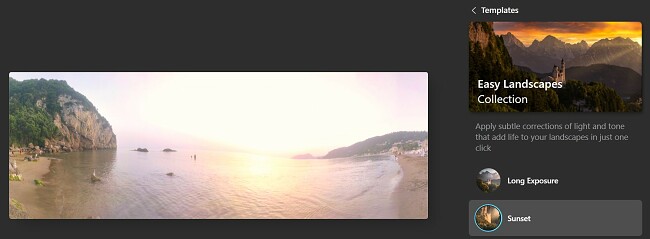
Templates can be adjusted, saved, and applied to large batches of pictures.
Mask AI Automatically Detect Objects in Photos
Mask AI makes it easy to make edits to specific elements on the image, without affecting the rest of the picture. The AI technology can identify objects such as people, skies, and water instead of having to do it manually. All I had to do was select the object, and Luminar created the mask.
Erasing Unwanted People or Objects in the Background
Whenever I’m taking a picture with my wife at the beach, we always need to either find a secluded area or perfectly frame the shot, so we don’t have “strangers” in our pictures. More often than not, we can’t find the perfect place and have people in the background. With Luminar’s erase tool, this practice is no longer necessary.
The process is really simple. I uploaded a picture that I wanted to clean up (the wife didn’t want me to use her picture, so it’s just me).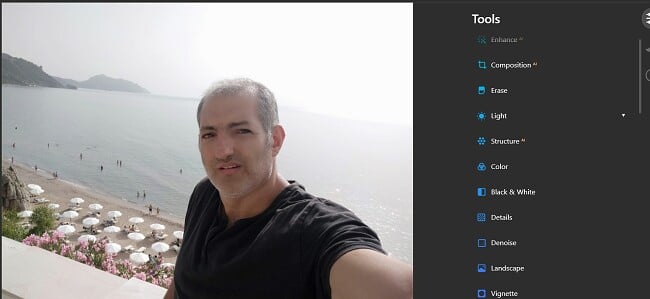 Select the Erase tool, highlight all the people or objects you want to erase, and then press the Erase button.
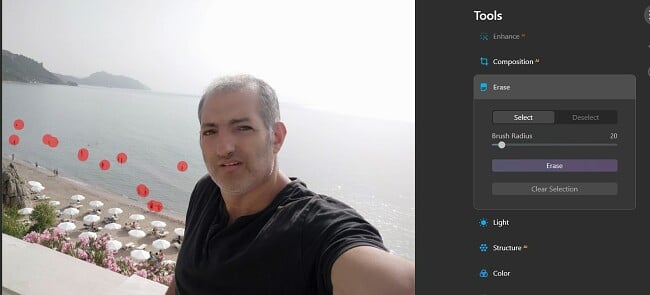 Luminar erased the people in other water, and it did a great job making it look like they were never there.
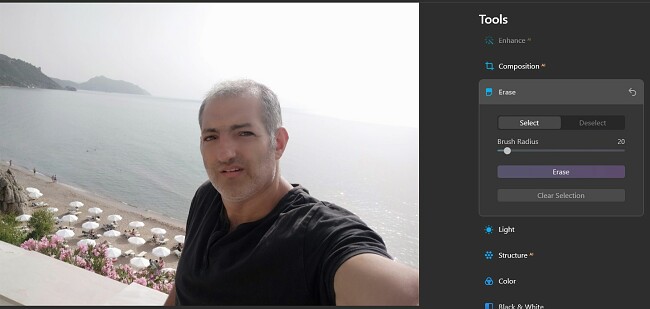 The Erase tool uses pixels based on the surrounding area to rebuild the erased area. It matches the texture, lighting, and shading of the original pixels to create a seamless image.
Change the Sky and Add Augmented Reality
It used to be that a photographer would have to wait for the perfect conditions to take a picture. That’s just not the case anymore. Luminar AI makes it so so easy to change the sky in your picture, you can just take the picture whenever you want and add clouds, clear blue skies, or make it cloudy and overcast.
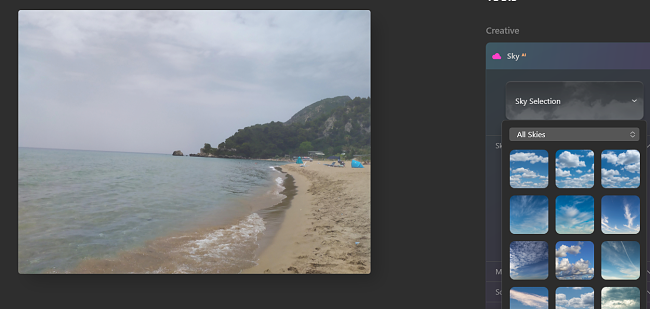
I wanted to get rid of the gray sky, so I chose one of the sky options, and it completely changed how the picture looked.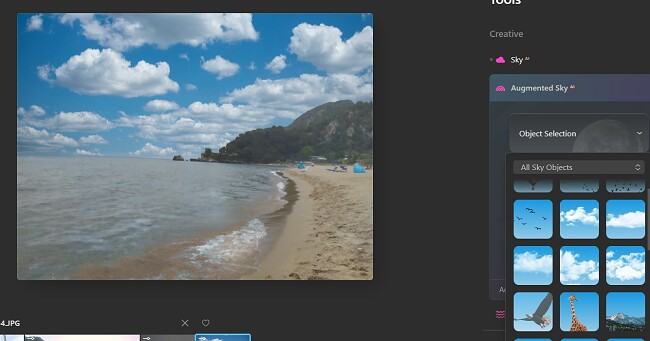
Luminar has a selection of Augmented Reality filters to spice up the picture. The options included adding birds, planes, hot air balloons, and even an entire mountain range.
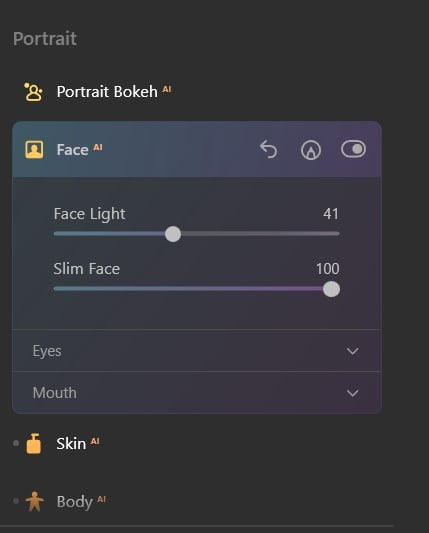
Edit People in your Pictures
Whether you think your face looks too fat or skinny in pictures, you want to have a more tan look, tighten up that belly just a little bit, or remove “imperfections” there are easy fixes with Luminar AI. I did find that some pictures work better than others, but in most cases, as long as you aren’t looking too closely, you won’t notice any distortions. These tools are located in the Portrait Tools sections. All you have to do is adjust the sliders and watch as the changes take place. If you don’t like how it looks, don’t worry, you didn’t ruin the picture. Just reset the slider, and it reverts back to the original image.
Professional Tools
So far, I’ve focused on the fun tools that were built for the average user who just wants to make some minor edits or changes. Luminar AI also has a collection of professional tools, such as Supercontrast, Optics, Color Harmony, and Dodge & Burn. These tools can adjust the color scheme, add warmth or brilliance to your picture, soften edges, increase strength, and more. These tools work in the same manner as everything else in Luminar – just move the slider to the right or left and stop when you’re happy with the results.
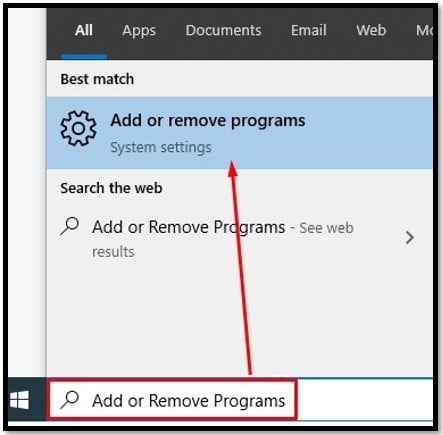
How to Uninstall Luminar AI From Your PC
If Luminar AI isn’t the right editing program for you, you can easily remove it from your computer in a few basic steps.
- Type Add or Remove Programs in the Windows search bar and click the Enter key.
![Add or Remove Program]()
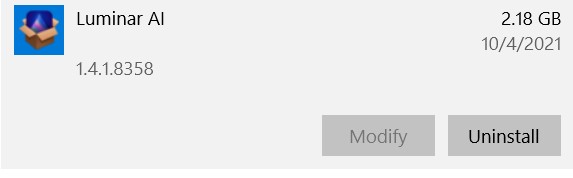
- Locate Luminar AI in the list of installed programs and click the Uninstall button.
![]()
- The Luminar AI setup wizard will open and give you three choices, Update, Repair, and Uninstall. Click the Uninstall button, and the program will be completely removed from your computer.
FAQ
Is Luminar free?
While there is no long-term free version of Luminar, there is a 30-day money-back guarantee. This gives you plenty of time to test the software and edit some of your pictures for free. Follow the steps above and I’ll show you how to download and install Luminar risk-free.
Is Luminar safe?
The Luminar software is free of viruses, malware, and spyware. Luminar releases several updates per year, and it’s important to update your software quickly since the older versions may have vulnerabilities that the updated version won’t have. Additionally, stay away from cracked Luminar or pirated copies as these often have harmful files attached to the installer. For your protection, I strongly recommend that you only download the official Luminar software.
Is Luminar compatible with other editing programs?
In addition to the built in editing features that come with the Luminar standalone app, you can also download a Luminar plugin that is compatible with Adobe Photoshop and Adobe Lightroom. The plugin brings powerful AI technology to these popular digital editing programs, so you can really take your pictures to the next level.
What formats are supported by Luminar?
When you’ve finished editing and are ready to produce your images, you can save them using the following formats:
- JPEG
- PNG
- TIFF
- PSD (Photoshop)