How to Remove a VPN From Your Desktop or Mobile Device
Reading time: 6 min
First published: Jan 21, 2019
Updated 3 times since publishing

If you’ve changed VPN provider, either after leaving a previous service, or just trying something new, you’ll want to remove the old program from your device entirely.

Any remaining files from the old VPN can cause conflicts with a newly installed VPN, like conflicting TAP drivers. This article will guide you on how to completely remove a VPN from your computer on multiple operating systems.
Quick navigation:
- 1 Removing a VPN from Windows
- 2 Removing a VPN from Windows (Manually)
- 3 Removing TAP Drivers from Windows PC
- 4 Remove a VPN on Mac OS X
- 5 Remove a VPN on iOS
- 6 Remove a VPN on Android
- 7 Remove a VPN on Linux
Editor’s Note: We value our relationship with our readers, and we strive to earn your trust through transparency and integrity. We are in the same ownership group as some of the industry-leading products reviewed on this site: ExpressVPN, CyberGhost, Private Internet Access, and Intego. That said, our detailed reviews follow a strict methodology that examines all relevant performance factors to help you arrive at your own informed conclusion.
Removing a VPN from PC
Deleting a VPN from a PC shouldn’t be too difficult, as they have protocols specifically for uninstalling applications on Mac and Windows.
These programs delete the program and any associated files, making them the easiest and one of the most effective way to remove a VPN.
Removing a VPN from Windows
One of the recommended ways to remove a VPN from Windows is to use the free version of Revo Uninstaller. While users can use their device’s integrated uninstaller program, Revo is considered more efficient and effective.
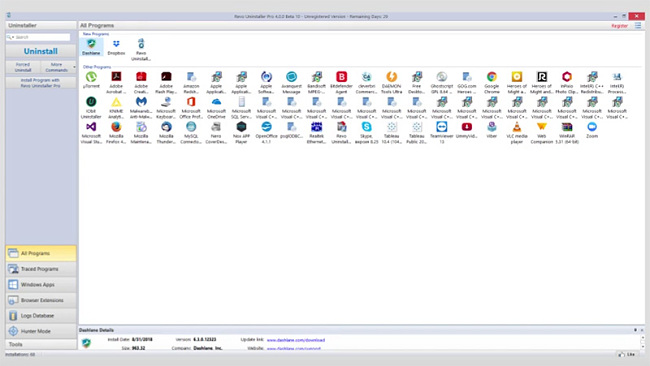
Steps to Use Revo Uninstaller (free version):
- Launch Revo Uninstaller.
- Choose the VPN you want to uninstall.
- Click “Uninstall.”
- Once done, you will be prompted to scan for leftover files.
- Click “Agree.”
- Revo Uninstaller will identify any remaining files that require deleting.
- Agree to delete the files.
Removing a VPN from Windows (Manually)
If your VPN was installed manually, you might need to uninstall manually too. Even if installed automatically, it could still be a good idea to manually uninstall it as a precaution to ensure all relative files are removed on your device.
Steps to Manually Remove VPN:
- Go to “Network and Sharing Center.”
- Click on “Change adapter settings.”
- You will now see VPN connections and adapters.
- Right click on the VPN and click “Delete.”
Removing TAP Drivers from Windows PC
TAP drivers are one of the reasons why installing multiple VPNs on your Windows device can result in problems.
These drivers enable your VPN to function, and when there is more than one VPN installed on a Windows PC, the TAP drivers from one can clash with the other, disrupting the VPN connection.
If you have removed your previous VPN successfully, you may still need to remove the TAP drivers. Even if you use an uninstall software, like Revo Uninstaller, the TAP drivers should also be removed.
Steps to Remove TAP Drivers:
- Go to Control Panel > System and Security > System > Device Manager.
- Scroll to Network Adapters.
- Right-click TAP drivers and click on “Uninstall.”
- Restart the computer.
Remove a VPN on Mac OS X
There are two recommended apps for removing a VPN on a device using Mac OS X: AppCleaner (free) and CleanApp for Mac; both are similar to Revo Uninstaller.
The Mac apps are simple to use, with simple instructions given to follow. CleanApp will scan for legacy files and then delete them, but after deleting s VPN from a Mac device, you will want to remove any remaining associated files manually.
Steps to Remove a VPN on Mac:
- Navigate to “System Preferences.”
- Click on “Profiles.”
- Click on the minus sign beside the VPN .
- Enter your admin password.
- The VPN servers you currently use will be deleted from your network.
Remove a VPN on iOS
If you have an iOS device with a VPN, you will need to delete the VPN app and then delete individual files to completely remove the VPN from your device.
Steps to Remove a VPN from iOS:
- Go to “Settings.”
- Tap on “General.”
- Tap on “Profile.”
- Tap on the VPN connection.
- Tap on “Delete Profile.”
- Confirm by tapping “Delete” again.
Remove a VPN on Android
If you have an Android device with a VPN, you will need to delete the VPN app and then delete individual files to completely remove the VPN from your device.
Steps to Remove a VPN from Android:
- Go to “Settings.”
- Tap on “Connections.”
- Tap on “More connection settings.”
- Tap on “VPN.”
- Go to “Set and manage Virtual Private Networks.”
- Long press the VPN you want to delete and click on “Delete Network.”
- When it has been deleted, you should see “No VPNs.”
Remove a VPN on Linux
- If you used a packet manager to install the VPN on a Linux device, then you will also need to use that packet manager to remove the VPN in its entiret This will be the only thing required to remove a VPN from Linux in most cases.
- Keep in mind that using APT “remove” isn’t enough when removing a VPN on Linux.
- To remove configuration files, you can use the “purge” function. (It may not delete all the files from the home folder.)
- Stacer and GCleaner are two good apps to remove a VPN from a Linux device.
Best VPNs
If you’re thinking about switching VPN providers, you can’t go wrong with ExpressVPN or CyberGhost; two of the most efficient products on the market.
1 ExpressVPN

- Lightning fast speeds
- 256-bit AES encryption
- Strict no-logs policy
- 2,000+ servers in 94 countries
- 30*-day money-back guarantee
Editor’s Note: Transparency is one of our core values at WizCase, so you should know we are in the same ownership group as ExpressVPN. That said, our detailed reviews follow a strict methodology that examines all relevant performance factors to help you arrive at your own informed conclusion.
2CyberGhost VPN

- 256-bit AES Encryption
- Simultaneous connections for up to 7 devices
- DNS and IP Leak Protection
- A strict policy of no-logs
- 3,000+ servers across 61 countries
Editor’s Note: Transparency is one of our core values at WizCase, so you should know we are in the same ownership group as CyberGhost VPN. That said, our detailed reviews follow a strict methodology that examines all relevant performance factors to help you arrive at your own informed conclusion.
Conclusion
Use caution and follow this guide and our recommended uninstallers to remove a VPN from your devices completely.
There’s nothing like a clean slate to help ensure you’re security, privacy, and anonymity online.
*Please note that the ExpressVPN’s 30-day money back guarantee is not available at the moment.


Leave a Comment
Cancel