
Adobe InDesign Download for Free - 2024 Latest Version
| 16.0.1 | |
| Windows, Mac | |
| Free Trial | |
| Adobe | |
| 1,697,482 | |
| Business Tools, Graphics and Design |

Adobe InDesign stands out as a premier graphic design layout program, boasting an extensive toolkit. It has gained favor among students and professionals alike for crafting layouts, catering to the needs of both traditional print media and dynamic online publications.
While it is a comprehensive software with complex tools, the basics of InDesign aren’t that difficult and are pretty easy to master. There are plenty of tutorials and guides that will help you learn more complex tools as well.
InDesign is part of the subscription-based Creative Cloud suite of apps. However, I’ll show you how you can download it free for 7 days.
Try Adobe InDesign Free for 7 Days!
How to Download and Install Adobe InDesign for Free
- Click here and the official Adobe InDesign download page will open in a new tab.
- Click the Free Trial button.
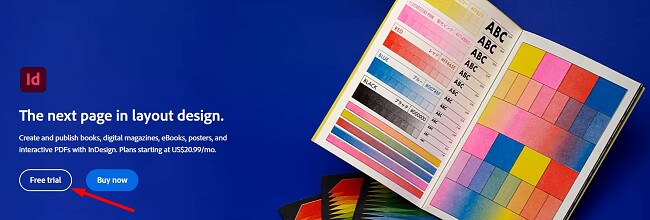
![Free Trial InDesign]()
- Adobe gives you two choices. You can either download the entire Creative Cloud, which includes over 20 apps, like Photoshop, Illustrator, Acrobat Pro, and more, or you can just download InDesign. I’m only downloading InDesign for this example, although the steps are the same for both options. Once you select your plan, click the Start Free Trial button.
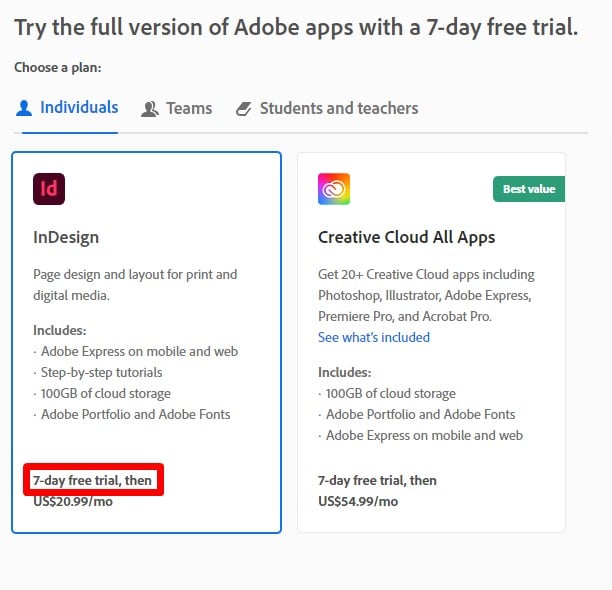
![InDesign Free trial Offer]()
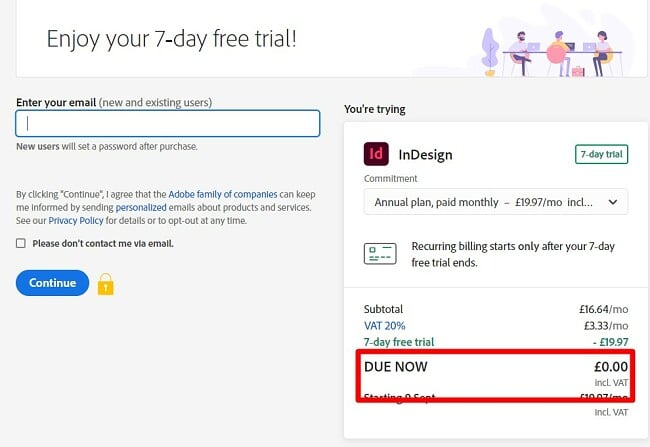
- Enter your email address and press continue. If you have an Adobe account, you will be prompted to log in. If you don’t have an account, you will have to register one now.
- Even though this is a completely free trial and not a money-back guarantee, Adobe requires that you enter your payment information before proceeding. When you’re done, press the Agree and Continue button.
![]()
- Once your payment method is confirmed, the Creative Cloud installation wizard will automatically download it to your computer.
- When the download is complete, open the setup wizard and enter your password.
- Creative Cloud will install on your computer. When the installation is complete, the InDesign download will begin automatically. If you chose to install all the Creative Cloud apps, they would also install now. Just be aware that these are large files, and it can take a few hours for everything to install.
Adobe InDesign Overview
Adobe InDesign sets the standard for the layout design software. Students and professionals use it to design and publish posters, marketing brochures, magazines, eBooks, and more.
Its popularity is largely due to the fact the program is intuitive and relatively easy to use. It has a full complement of tools for editing all aspects of the layout, from the headers and footers to adjusting image sizes, editing PDF files, and choosing from the Adobe Fonts collection of typesetting options.
InDesign is part of the Adobe Creative Cloud. This makes it easy to import and upload files .psd files from Photoshop, vector images from Illustrator, and files from other Adobe products.
The InDesign interface has a similar layout as other Adobe products. If you’ve never used them before, be sure to take advantage of the built-in tutorial to learn how to best use the workspace and different tools.
InDesign Features
Update: The latest release of InDesign can make a big difference when working on large or complex documents. Here are some of the key improvements:
- Overall speed: The new version of InDesign is up to 30% faster than previous versions.
- File handling: Open and save large files more quickly, and work smoothly without experiencing lag or crashes.
- Rendering: See changes to your document nearly instantaneously, and export faster than ever before.
- Stability: Less crashes or other errors.
Overall, the performance improvements in InDesign make the software more efficient, responsive, and stable. This can help you to save time and create professional-looking documents more easily.
The main focus of InDesign is providing you with the tools you need to create professional, attractive page layouts.
It is a massive software with hundreds of features and tools, more than I can possibly go through in this post. I will highlight some of the main features, and go through some of the tools to help get you started. Adobe has detailed guides and tutorials that you can use to learn about specific tools and functions.
Everything You Need to Design Your Layout
InDesign has a great selection of layout templates that you can use for your project. However, if you prefer to design your own layout, InDesign has everything you need to get your page looking just right.
- Master page: A true time-saver if your project has multiple pages. The Master page will include elements that you want to appear on every page. Now, you don’t have to do the same work multiple times or copy/paste from page to page.
- Add objects: Easily add anything from page numbers, headers and footers, chapter breaks, images, and any other element that you need to organize your layout.
- Responsive Design: InDesign has a Liquid Layout tool that scales the page based on the size of the display screen. It will automatically adjust all the elements on the page when it’s viewed on a mobile device or change from Landscape to Portrait mode.
- Create sections: You can design your layout however you like with the intuitive section breaks. Add as many as you’d like, whether they are squares, circles, rectangles, octagons, or you just want everything laid out in different columns. The sections are fully customizable.
- Add Tables: You can use tables to organize the content on your page. With InDesign, you can create and design your own table or import it from other applications.
Excellent Typography Options
Attaining excellence in the visual presentation of text becomes vital when crafting marketing materials or releasing a book. Text assumes a pivotal role in narrating your page’s story, frequently surpassing images in importance. Making the right choices in terms of font, size, and layout holds the potential to create a substantial impact, drawing readers’ interest and motivating them to interact with your published content, instead of seeking alternatives.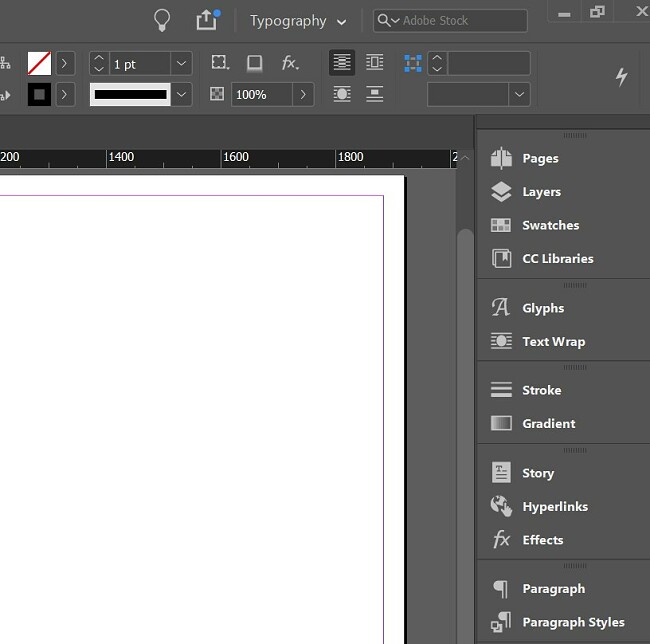
- Manipulate text: Using the Adobe Sensei tool, InDesign makes it easy to manipulate the text however you want. From the basic options like aligning it right, center, or left to more advanced techniques like wrapping it around an image or object.
- Fonts: Not only can you use any of the hundreds of fonts available through Adobe Fonts, but you can also upload your own fonts. InDesign supports OpenType SVG fonts.
- Compatible with multiple languages: InDesign works with texts that go from left to right and right to left. There are built-in language options so you can create your work in Japanese, Arabic, and other non-English characters. Additionally, there is a Glyph panel if you want to add glyphs and special characters to your page.
- Drop caps: Increasing the size of the first letter of a paragraph, or a section is a popular design choice for many brochures and books. InDesign makes it easy to set the first letter or “Drop Cap” size and gives it a nice border with customized corners.
Save Time with Auto Style
Auto Style is a new feature that InDesign just released. It uses Adobe Sensei to automatically apply formatting to text by identifying all the text elements and applying a Style Pack to unformatted text. This will save you a lot of time and effort, especially when working on long or complex documents.
Auto Style can recognize a variety of text elements, such as headings, body copy, lists, and tables. It can also apply different formatting styles to different types of text. For example, it will automatically apply a bold font to headings and a smaller font to body copy.
While Auto Style is still under development, I found that it’s already a very powerful tool. I used it to ensure that all of the text in a document is formatted consistently, which can give the document a more professional appearance.
Great Selection of Editing Tools
There are four types of editing tools. These make it easy to edit documents, graphics, and text: The basic tools that are pre-set on the Essentials workspace
- Selection: The black arrow is one of the most important selection tools in the InDesign toolbox. Use it to activate a layer or select an object. Once activated, you can move it around, change the color, shading, or group it with other objects.
- Transformation: You can use the transformation tools to adjust the proportions of an object, change its orientation and size. The geometric information about each object is located in the Transform panel. This information includes values for position, size, rotation, and shearing.
- Drawing and type: You can use the Pen and Pencil tools to add simple illustrations and objects to your layout.
- Modification and navigation: Use these tools to measure objects and make sure that your design isn’t too “busy” or overcrowded.
Compatible with Interactive PDF Files
It is unsurprising that Adobe, the company responsible for pioneering the PDF format, incorporated PDF compatibility into InDesign. In the most recent version of InDesign, the process has been optimized, allowing for direct editing of PDF files within the software, eliminating the need to perform edits in Acrobat and then import them into your project. Furthermore, you can easily share the PDF file with others and conveniently view any comments, annotations, or modifications made by fellow team members.
The PDF can include interactive features such as buttons, video clips, bookmarks, transitions for multi-page documents, and audio. These features are incredibly useful when creating layouts and designs for the web.
Add Links for Online Publications
If you’re working on a project that will be published online, it’s important to add content that users can click on to jump from one page to another. While this has always been a simple action when working with HTML or building websites, it hasn’t always been easy to do when creating web pages, eBooks, and brochures through InDesign. With InDesign you can:
- Add Hyperlinks: You can link from specific words or pictures to lead your reader or user to another page within the site or an external site.
- Design Buttons: Whether you want readers to subscribe to your publication or click a button to place a vote, you can add buttons that perform specific tasks with InDesign.
- Bookmarks: If you’re having people download large PDF files, you can add bookmarks to make it easy to navigate to specific pages or text within the document.
- Import links from Microsoft Word: If you did all the writing, including adding links, in Microsoft Word, you’ll be happy to hear that InDesign will maintain the formatting and links, so you don’t have to do the same work twice.
Preflight Checks Your Document for Errors
Preflight is a feature in Adobe InDesign that checks your document for errors before you export it. This can help you to avoid problems when you print or publish your document.
It works by comparing your document to a set of predefined rules. These rules can be used to check for a variety of errors, such as:
- Missing fonts: If a font is missing from your document, Preflight will flag the error. This can help to ensure that your document prints or publishes correctly.
Embedded images with low resolution: If an embedded image has a low resolution, Preflight will flag the error. This can help to ensure that your document prints or publishes with high-quality images. - Overset text: If text is overset, it means that there is not enough room for all of the text to fit on the page. Preflight will flag this error, which can help you to avoid problems when you print or publish your document.
- Color inconsistencies: If there are color inconsistencies in your document, Preflight will flag the error. This can help to ensure that your document prints or publishes with accurate colors.
- PDF compatibility issues: If there are PDF compatibility issues in your document, Preflight will flag the error. This can help to ensure that your document can be opened and viewed correctly by other users.
To get started, open the Preflight panel (Window > Preflight). Then, select a Preflight profile from the drop-down list. Preflight profiles are sets of predefined rules that you can use to check your document for specific errors. There are several Preflight profiles available, so you can choose one that is specific to the type of document you are working on and the way you plan to export it.
Once you have selected a preflight profile, click the Analyze button to start the preflight inspection. Preflight will then scan your document for errors. If any errors are found, Preflight will list them in the Preflight panel. You can then double-click on an error to view more information about it.
To fix an error, simply click the Fix button. Preflight will then attempt to fix the error automatically. If Preflight is unable to fix the error automatically, you will need to fix it manually.
Once you have fixed all of the errors in your document, you can export your document with confidence.
Publish Your Online Work
By utilizing InDesign, you have the convenience of publishing your project online without the need to download extra software or install plugins. Once your project is completed, it will acquire a shareable URL, allowing it to be easily accessed on both computers and mobile devices. Moreover, you have the flexibility to effortlessly update your published documents by incorporating fresh images, videos, or other multimedia elements and subsequently republishing the revised file.
InDesign added an important update when publishing a document that allows users to search for specific texts in the document. I’m honestly surprised it took them so long to release an update like this but I’m glad it finally happened.
To enable searchable text when publishing online, you just have to activate the “Allow viewers to Search and Copy text in the published document” option when you publish your document. Once your document is published, readers will be able to search for text using the search bar at the top of the document.
Having searchable text makes your published documents more user-friendly and accessible. It is especially useful for users who need to find information quickly and easily.
Google Analytics Integration
After you publish your project, you can now integrate it with Google Analytics. This feature was added in the latest InDesign release and it allows you to track traffic and engagement for your published documents. It provides actionable insights, such as who is interacting with your projects, how they’re engaging, where they come from, and so much more. You can then take the data, and make adjustments to your documents to improve its ROI.
You need a Google Account before you can set up the integration. Once the account is active, open your InDesign document, and click on the File button. Then click Publish Online, and click on the Analytics tab. You will be prompted to enter your Google Analytics tracking ID, and finally, press the publish button.
Once you have published your document, you will be able to track traffic and engagement in your Google Analytics account.
To get the most benefits out of this integration, you should create a separate Google Analytics account for your InDesign documents. This will make it easier to track traffic and engagement for your documents. Additionally, set up goals so you can track how people are interacting with your documents and completing specific actions, such as downloading a file or clicking on a link.
Ease Of Use
At first glance, InDesign appears to be a very complex program. However, if you’ve any other Adobe products, you will have an easier time figuring out the layout and how the panel system works, where all the tools are stored.
While tools aren’t that difficult to learn, and you certainly don’t have to be a professional marketer or graphic designer to use them, it can take some time to familiarize yourself with everything. InDesign has a very useful tutorial that goes through the different panels and tools. You can customize the panels so that you’ll have quick access to the tools you frequently use. If you aren’t sure what a tool is called, you can put your mouse over it for a second, and it will show its name. Then, you can search for that tool in the tutorial to learn how to use it.
InDesign has some beautiful templates that will help you get started. You filter them by web design, print media, and mobile to find the one that fits your needs. I found this to be really helpful in getting started before I attempted to create my own layout from scratch.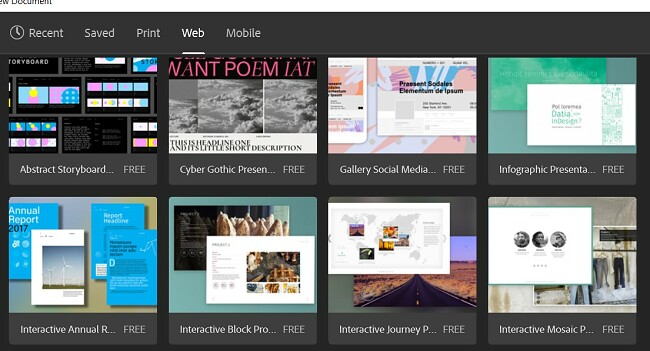
Interface
Adobe created a fully customizable interface for InDesign. It stays consistent with other Adobe apps by using the dark grey workspace, but you can change the color if you prefer something a little livelier.
The main workspace is on the center of the screen with the most commonly used tools on the left, different options for the tools on the top bar, and panels and customization options on the right.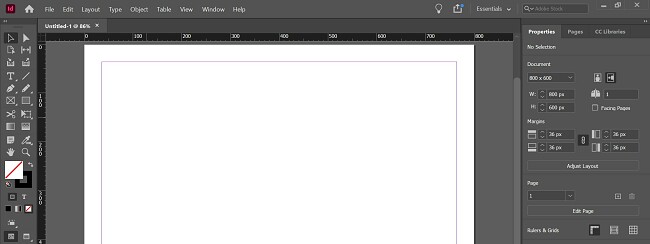
The workspaces are really what makes InDesign so easy to use, especially with big projects. You can create multiple workspaces, each dedicated to a different task, and quickly switch between them.
I found this especially helpful when working on projects that include both print and interactive web-based projects. Each page has its own layout requirement, and I have dedicated workspaces for each.
The basic workspace is called the Essentials, and you can add or remove any tools based on what you’re working on. There are also workspaces dedicated to books, printing and proofing, and typography. You can change the workspace by clicking on the Workspace name on the top bar of your screen.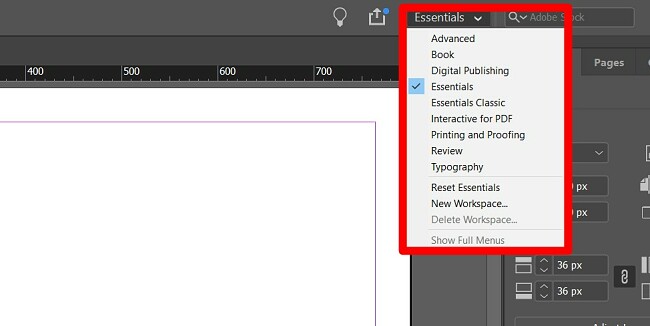
You can use the workspaces as a starting point, and as you get more comfortable with the tools, adjust it to fit your needs. InDesign also gives you the control to dock your workspaces, undock those you don’t need, or set it as a floater.
Compatibility
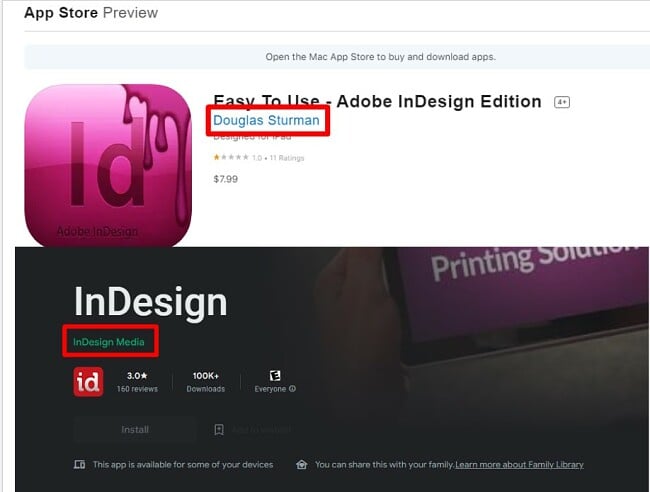
InDesign is only available for Windows and Mac, and there is no official InDesign app for tablets or phones. Don’t be fooled by the InDesign app in the Google Play and iTunes app stores. These are tutorials or apps claiming to be InDesign, but if you look at the developer, you’ll see that they don’t come from Adobe.
InDesign System Requirements for PC and Mac
These are the essential specifications needed to run InDesign. If your computer lacks the appropriate processor, RAM, or supported video adapter, the software may not function properly and could lead to system crashes. Alongside meeting these minimum requirements, InDesign only requires an internet connection for license validation during installation. Nevertheless, certain libraries and services may necessitate an internet connection to be accessible.
Windows
| Processor | Multicore Intel or AMD Athlon |
| OS | Windows 10, 11 (64-bit) |
| RAM | 8 GB |
| Available Hard Disk Space | 3.6 GB |
| Monitor Resolution | 1024 x 768 and HiDPI display support |
| Supported Video Adapter | 32-bit video card |
macOS
| Processor | Either multicore Intel or Apple Silicon/M1, and it must have an SSE4.2+ SIMD Engine |
| OS | 10.15 (Catalina) or higher |
| RAM | 8 GB |
| Available Hard Disk Space | 4.5 GB |
| Monitor Resolution | 1024 x 768 with Retina display support |
| Supported Video Adapter | 32-bit video card |
Even if your computer meets the minimum requirement, you can benefit from these tips to improve the performance of InDesign:
- Use a computer with a powerful processor and plenty of RAM. The minimum will specs are OK, but the better the processor and the RAM you have, the better the software will run.
- Work on a local drive instead of a network drive.
- Close any unnecessary programs that are running in the background.
- Keep your InDesign installation up to date.
- Use the Performance panel to monitor your system’s resources and identify any areas where you can improve performance.
How to Uninstall Adobe InDesign
At the end of your free trial, you can uninstall Adobe InDesign in a few simple steps.
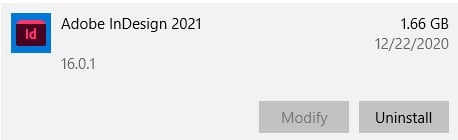
- Type Add or Remove Programs in the Windows search bar and press the Enter key.
- Find Adobe InDesign in the list of installed programs and press the Uninstall button.
![Uninstall Adobe InDesign]()
- The Adobe Creative Cloud app will open and check if you want to save your InDesign settings on the computer. If you have no intention of reinstalling the software, click No.
- The Adobe Uninstallation Wizard will remove InDesign from your computer.
How to Cancel Your Adobe InDesign Account
If you’re finished using Adobe InDesign, you can cancel your account before the end of the 8-day trial. As soon as you click on the Cancel Plan link, you will lose access to InDesign. Follow these steps to cancel your Adobe account:
- Log in to your Adobe account.
- Open the Plans option, located on the menu bar.

![cancel Adobe 1]()
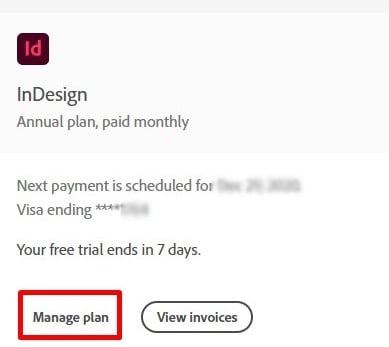
- Click on Manage Plans.
![manage plans Adobe]()
- Press the Cancel Plan button.

![cancel Adobe]()
- A new page will open with questions about why you’re canceling your account. You can skip the questions and just click the Confirm link at the bottom of the page.
- Once your account is canceled, you will immediately lose access to InDesign.
Additional Adobe Creative Cloud Apps
Adobe Photoshop: The top graphic editor just keeps getting better. The latest version of Photoshop includes easy-to-use tools to adjust a person’s facial features, quickly change the color of the sky and improved font match tools. All of this is in addition to the high-level tools and layering methodology that made Photoshop a household name.
Adobe Illustrator: If you’re working with vector-based images, Adobe Illustrator is a program you need to download. It comes with a complete toolset for creating, editing, and producing scalable vector-based images. Illustrator has a wide selection of templates and video tutorials to teach you how to properly use each tool if you’re just getting started.
Adobe Premiere Pro: Whether you’re creating a full-length feature film or putting together a clip show for a friend, Adobe Premiere Pro has the video editing tools for you. The multi-track editing software allows for multi-camera angle editing, adjusting color and balance, adding visual effects, and much more.
FAQ
Is Adobe InDesign free?
How can I add page numbers in InDesign?
There are a few ways to add page numbers. One is to create a text frame on each page where you want the page numbers to appear. Then, type the current page number into the text frame. InDesign will automatically update the page numbers as you add and remove pages from your document.
Another option is to do the following:
- Go to Layout > Numbering & Section Options.
- In the Numbering & Section Options dialog box, select the Start Section checkbox.
- Under Section Prefix, enter a name for your section.
- Under Start Page Number, enter the number where you want the page numbering to start.
- Click OK.
How to save an InDesign file as a PDF?
How to turn off hyphenation in InDesign?
InDesign offers a number of options for controlling hyphenation. You can turn off hyphenation for all or part of your document, or you can specify the minimum and maximum number of characters that must be before and after a hyphen. You can also specify which letters are not allowed to be hyphenated.
To access the hyphenation settings in InDesign, go to Text > Paragraph Styles and double-click on the paragraph style that you want to change. In the Paragraph Style Options dialog box, click the Hyphenation tab.
How to add fonts to InDesign?
InDeisgn comes with excellent typography options to help you get your project looking exactly how you envision it. If the font you want to use isn’t included in the hundreds of Adobe Fonts that come built in, you can upload other OpenType SVG fonts by following these steps.
- Go to Window > Type > Font Book.
- In the Font Book panel, click the + button.
- Navigate to the font file that you want to add and click Open.
The font will be added to your Font Book panel, so you can use it on your documents.
How to insert images in InDesign?
There are a few different ways to insert an image in InDesign, depending on your needs. The first step is always to click on the File button and then select Place and choose the image. Now you can insert the image anywhere you want on the document and adjust its size.
If you want to add the image to an existing frame, you have to select the frame first, and then click File>Place, and a dialogue box will open and you can add the photo.
The third method is to drag and drop the image from your computer’s folder onto your workspace. The image will upload to InDesign and you can move it around, adjust the size, or drag it to a frame and insert it there.
Is Adobe InDesign secure?
Is InDesign compatible with other Adobe products?
Will I be charged at the end of my InDesign free trial?
Bottom Line
Adobe InDesign is the leading layout software for both print and online media. It has all the features and tools needed to ensure that you get the layout you want, including extensive typography options, a variety of templates, master pages, responsive designs, and multiple types of editing tools. It has a preflight feature that checks the document for different types of mistakes before publishing or exporting the finished project.
You can try Adobe InDesign free for 7 days to see if it’s right for you, or to complete a quick layout project for free.
Download Adobe InDesign now!